You can use various tools to modify and enhance photos.
| Icon | Name | Description |
|---|---|---|
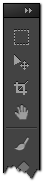
| Select Tool | Select a desired area to paint or apply effects or do any other actions. The selected area in the photo is marked by the dotted line. If you perform actions on a layer or channel, the content in the layer or channel you are working on will be selected. The content in other layers or channels will not be selected. | |
| Transform | Display the target to edit as a small rectangle or dotted line. This cannot be used in the background layer of the background window. | |
| Crop Tool | Select the area to crop. | |
| Hand Tool | Move a photo by dragging the pointer. If the photo size is magnified and the full photo is not visible, then select [Hand] tool and drag the pointer on the photo to move the photo. The photo location will not be moved, but the part of the photo that is visible on the screen is changed. | |
| Brush | Open up various types of brushes that can be used to paint or draw figures. Click or drag multiple times to repeatedly use the same effect. | |
| Eraser | Erase undesired areas in your photo. Deleted pixels are filled with the background color in background images and filled with transparent color in other layers. | |
| Clone | Copy parts of your photo to another location or photo. | |
| Pattern Brush | Paint a photo with the selected pattern by using a brush. | |
| Effect Brush | Add effects to the desired part of your photo. You can click or drag the same location multiple times to repeatedly use the same effect. | |
| Shape | Draw various shapes. | |
| Paint | Fill the pixels having a similar color as the location clicked with the foreground color. | |
| Pattern Paint | Fill the pixels having a similar color as the location clicked with a pattern. | |
| Gradient | Fill a photo with gradations, which means a gradual change from one color to another. Drag to create a different gradient depending on the selected shape. | |
| Text | Add text to your photo. Click on the location where you want to enter text, and start typing to add text to it. | |
| Pen Tool | Create a shape used in photo editing works. | |
| Eyedropper Tool | Display or select the color of a pixel in a photo. You can place the eye dropper on the pixel that has your desired color, and click to select the pixel's color. | |
| Change Color | Select the color to be used. Two boxes are overlapped. The top left box shows the foreground color while the bottom right box shows the background color. If a single color is used in work, the foreground color is used. The background color is used to fill a photo when you use the Shape tool or fill an area deleted by the Eraser tool in the background layer. If you want to change the foreground color (or background color), click on the color. | |
| Undo | Cancel Foxit Studio Photo actions on the selected photo, one by one. | |
| Redo | Re-execute actions canceled by using [Undo] tool, one by one. | |
| Arrange Window | Arrange the windows that compose the Foxit Studio Photo screen. All windows will be moved to their default locations |