Overview
Foxit PDF Reader Website Edition integrates RMS plugin in the software to extend the access control of Microsoft Windows Server® AD RMS on client systems. You will be offered a 14-day trial for RMS functions. To continue to use RMS functions after the evaluation period, you can contact Foxit at sales@foxit.com to purchase a RMS license for the Foxit RMS plug-in.
Prerequisites
If you are using the Microsoft Azure Rights Management (Azure RMS) environment, you can log in to the RMS server directly within Foxit PDF Reader.
If you are using the Microsoft Active Directory Rights Management Services (AD RMS) environment, you need to do the following deployment steps.
Deploy Active Directory Rights Management Services
In order to use Microsoft Rights Management Services in your client system, you need to follow Microsoft's instructions to deploy the Active Directory Rights Management Services (AD RMS) mobile device extension first. For detailed deployment steps, please refer to “Active Directory Rights Management Services Mobile Device Extension”.
When deploying Active Directory Rights Management Service mobile device extension, you need to run the following Windows PowerShell commands in order to authorize Foxit PDF Reader for your devices.
Add-AdfsClient -Name "Foxit Reader for OS X" -ClientId "3df27ee0-ee38-44ef-af7c-f7f4850f4450" -RedirectUri @("com.foxitsoftware.com.reader-for-osx://authorize")
RMS Encryption
- Click Protect.
- If you are using the RMS functions for the first time, choose Restrict Access > Connect to Digital Right Management Servers and Get Templates to log in to the RMS server first.
- If you have logged in to the RMS server before, choose Restrict Access.
- Select a template to encrypt the PDF file.
- If you don't want to use the template, click Restricted Access option to specify the permissions. Please refer to “Specify the Permissions to PDF Files” for more details.
Tip: Foxit PDF Reader allows you to encrypt PDF files with the official rights policy templates as well as custom templates. Official rights policy templates are based on the RMS server. Custom templates are customized by users. For instructions on how to customize a template, please refer to “Create Custom Templates”.
Specify the Permissions to PDF Files
- Click Protect > Restrict Access > Restricted Access.
- In the pop-up Permission window, check Restrict permission to this document, and do the following:
- 1. Enter the email addresses of users in the respective boxes. You can also click
 to authorize all users with the permissions.
 - 2. Click More Options to set additional permissions.
- 2.1. In the User List, click Add or Remove to add or remove an authorized user.
- 2.2. Check the additional permissions in the “Additional permissions for users”. You can click Extended policy to control the document usage:
- Only allow access by this IP range: specify an IP range that is allowed to access a document.
- Only allow access to these pages: specify the page number(s) that a user is allow to access.
- Number of accesses: specify the number of times that a user is allowed to access a document.
- Number of prints: specify the number of times that a user is allowed to print a document.
Note: To specify the “Number of accesses” and “Number of prints” items in an on-premise environment, click the Web Service Configuration to configure the web service and SQL first, and then enable the extended policy with the Foxit Configuration Tool.
- 2.3. Check the additional settings and select a security watermark. For the instructions on how to add a security watermark, please refer to “Security Watermark Management”.
- 2.4 If needed, click Save Defaults to make the additional settings the default, or click Save As Template to save the settings as a template for further use.
- 1. Enter the email addresses of users in the respective boxes. You can also click
- Click OK to encrypt the PDF files with the settings you specified.
Create Custom Templates
- Click Protect > Settings > Custom Templates.
- Click Create: You can click Edit or Delete to edit or delete an existing custom template.
- Specify the template outline, and click Next.
- Add users, check the permissions for users, and click Next.
- Specify when the content expires, and click Next.
- Specify the security watermark and extended policies, and then click Finish. For detailed instructions, please refer to Security Watermark Management and Extended Policy.
- Click OK, and the custom template will be added to the template list under Restricted Access.
Security Watermark Management
- Click Protect > Settings > Security Watermark.
- Do one of the following:
- New Profile: Add a new watermark profile.
- Add: Add a security watermark.
- Edit: Edit an existing watermark.
- Delete: Delete the selected watermark.
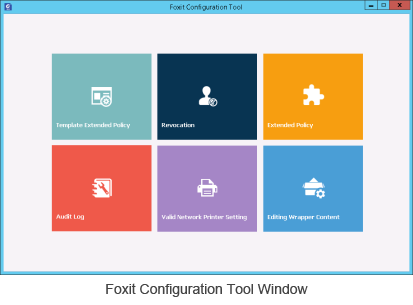
Foxit Configuration Tool (Used in a Windows RMS Server)
Foxit PDF Reader RMS protector provides a handy configuration tool for administrators to better modify the protection settings on a RMS server. Administrators can directly enable/disable each tool, edit the extended policies of official templates, dynamically revoke permissions, audit logs, and customize wrapper files.
To use the configuration tool to encrypt PDFs, please do the following:
- Log in to your RMS server.
- Download the Foxit Configuration Tool from:
- Unzip and Run Foxit Configuration Tool, you can then use the different tools in the Foxit Configuration Tool window. Note: Before getting started, you need to configure the VBScript in the unzipped folder by inputting your specific localhost address and port number in the script. The default port number in the script is 80, such as admin_role = config_manager.Initialize(true,"localhost",80,"","",""). You need to change the port number to the one your server currently uses.
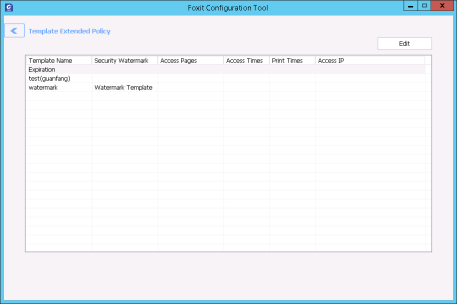
Template Extended Policy
With the Foxit Configuration Tool, administrators can easily edit the extended policy of official templates. Click Template ExtendedPolicy tool and choose one template to edit. See also Extended Policy.
Tip: Click the Back  button in the left corner to return to the Foxit Configuration Tool window.
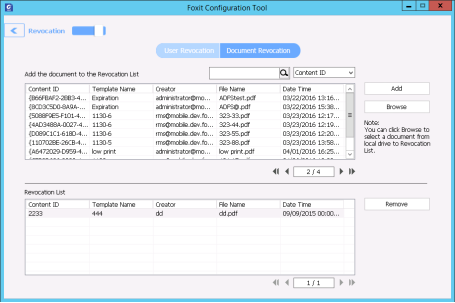
Dynamic Revocation
Revocation is a mechanism that revokes a PDF document that has already been issued. A common use of revocation is to remove rights from an individual when he is no longer authorized or to restrict access to a document when it becomes out of date or invalid.
Note: To revoke a PDF document/user in an on-premise environment, please refer to Web Service Configuration to configure the web service and SQL first. Then choose the Revocation tool in the Foxit Configuration Tool window and enable the tool by clicking the button .
.
To revoke a PDF document, click Document Revocation. Select the PDF document you want to revoke, click the Add button to add the document to the Revocation List. Or you can click Browse to select a document from a local drive to add to the Revocation List. To remove the revocation, please select the document in the Revocation List and click the Remove button.
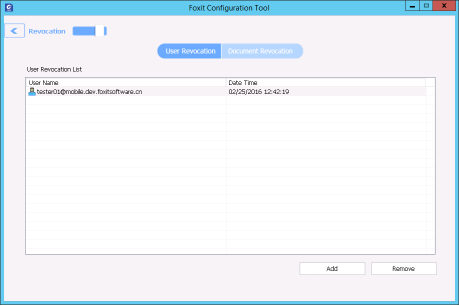
To revoke a user, click User Revocation. Click Add button to add a user to the User Revocation List. To remove the revocation, please select the user in the list and click Remove button.
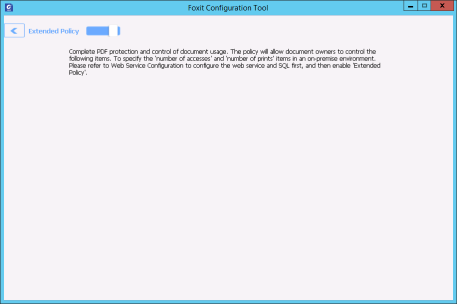
Extended Policy
Foxit Configuration Tool provides you with Extended Policy to add complete PDF protection and control to your PDF documents. The policy allows documents owners to control the number of access and the number of prints in an on-premise environment. Before you specify the two permissions, please refer to Web Service Configuration to configure the web service and SQL first, and then choose the Extended Policy tool in the Foxit Configuration Tool window and enable the tool by clicking the button .
.
Auditing Logs
Foxit PDF Reader enables you to track the usage of RMS protected files to record the actions on the files during workflow, including who accessed the document, what document was accessed, when it was accessed, how it was accessed and the success of that access, and more.
To audit logs, please refer to Web Service Configuration to configure the web service and SQL first, and then choose the Audit Log tool in the Foxit Configuration Tool window and enable the tool by clicking the button .
.
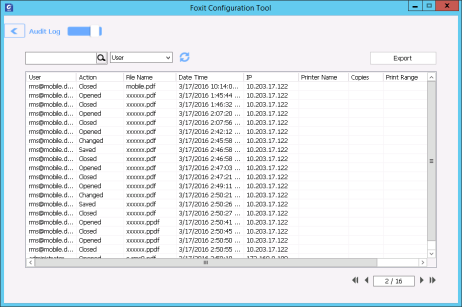
Choose one log and click on the Export button to export to Foxit PDF Reader's registry or Foxit PDF Editor's to generate a .reg file for the administrator's configuration. The administrator can distribute the .reg file to client-end computers.
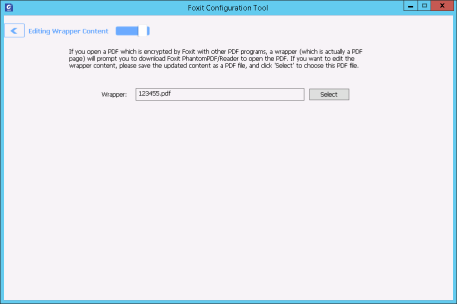
Edit Wrapper Content
If you open a PDF which is encrypted by Foxit with other PDF viewers, a wrapper (which is a PDF page) appears with a prompt that you need to download Foxit PDF Reader/Foxit PDF Editor to open the encrypted PDF. With Foxit Configuration Tool, you can customize the wrapper by selecting a desired PDF file.
To apply a custom wrapper, please refer to Web Service Configuration to configure the web service and SQL first. Then choose the Edit Wrapper Content tool in the Foxit Configuration Tool window, enable the tool by clicking the button  , and select a desired PDF file.
RMS Decryption
You can decrypt the RMS protected PDF file if you are authorized.
- Open the encrypted PDF file with Foxit PDF Reader;
- Click Protect > Restrict Access > Unrestricted Access;
- Click OK in the pop-up message to confirm your operation.
Change RMS Account
To change the RMS account, click Protect > Settings > Change Account, and input your new account to sign in. To successfully switch the RMS account, you need to close the RMS-protected file before changing the account.