How to Create Reusable PDF Document Templates
Here it is explained how to create reusable PDF document templates on Foxit eSign.
Steps to Create a Reusable PDF Document Template
All the steps below assume you are logged in with an active account on foxitsign.foxit.com.
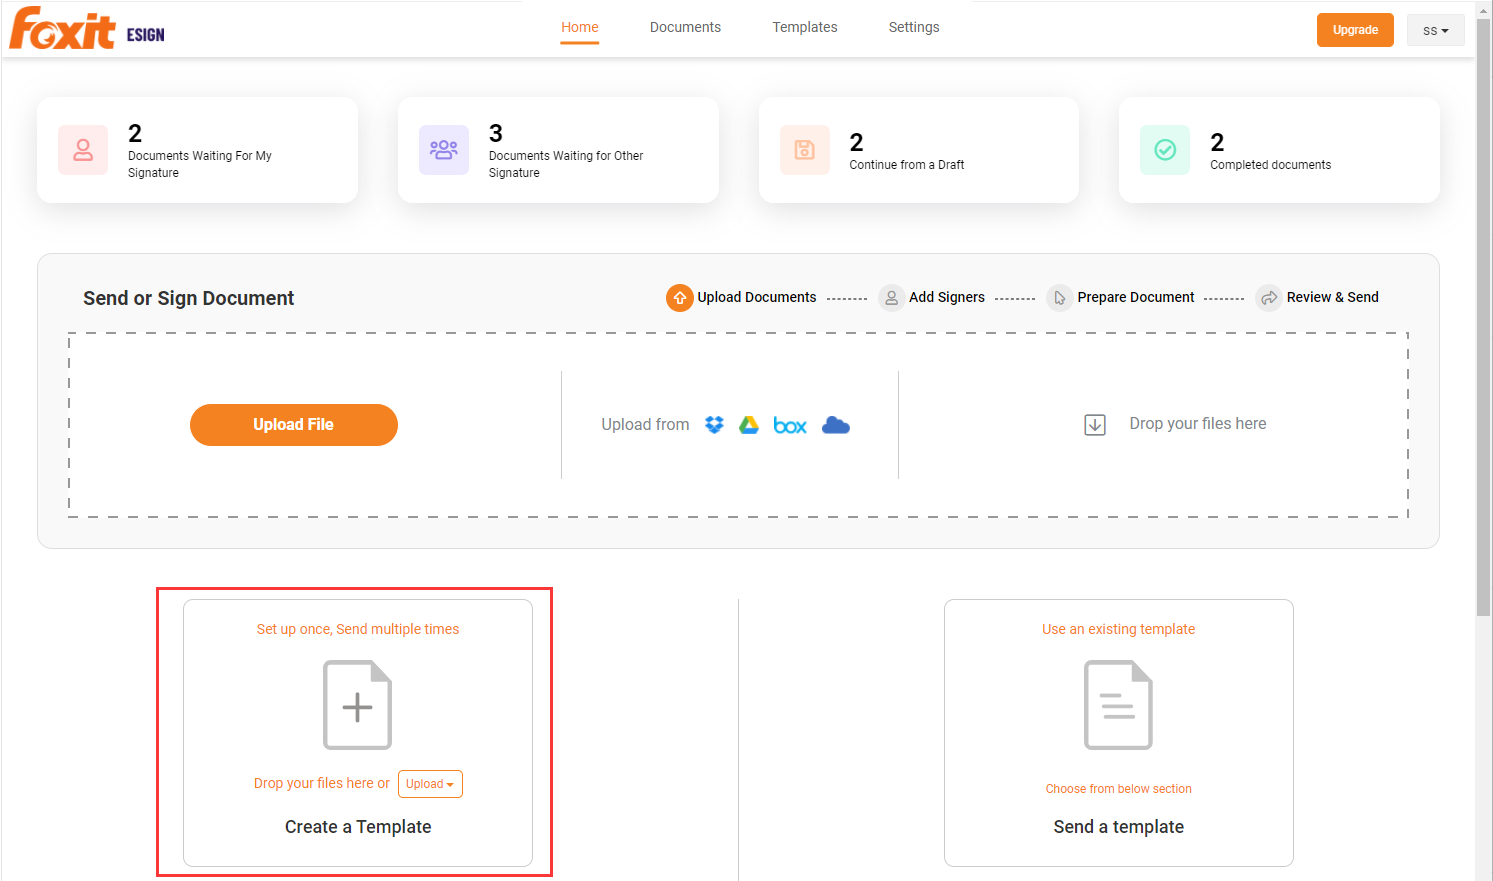
- Log in to the application and click on ‘Create a Template’ on the homepage.

- You can now choose the required PDF file from your computer to create a template.
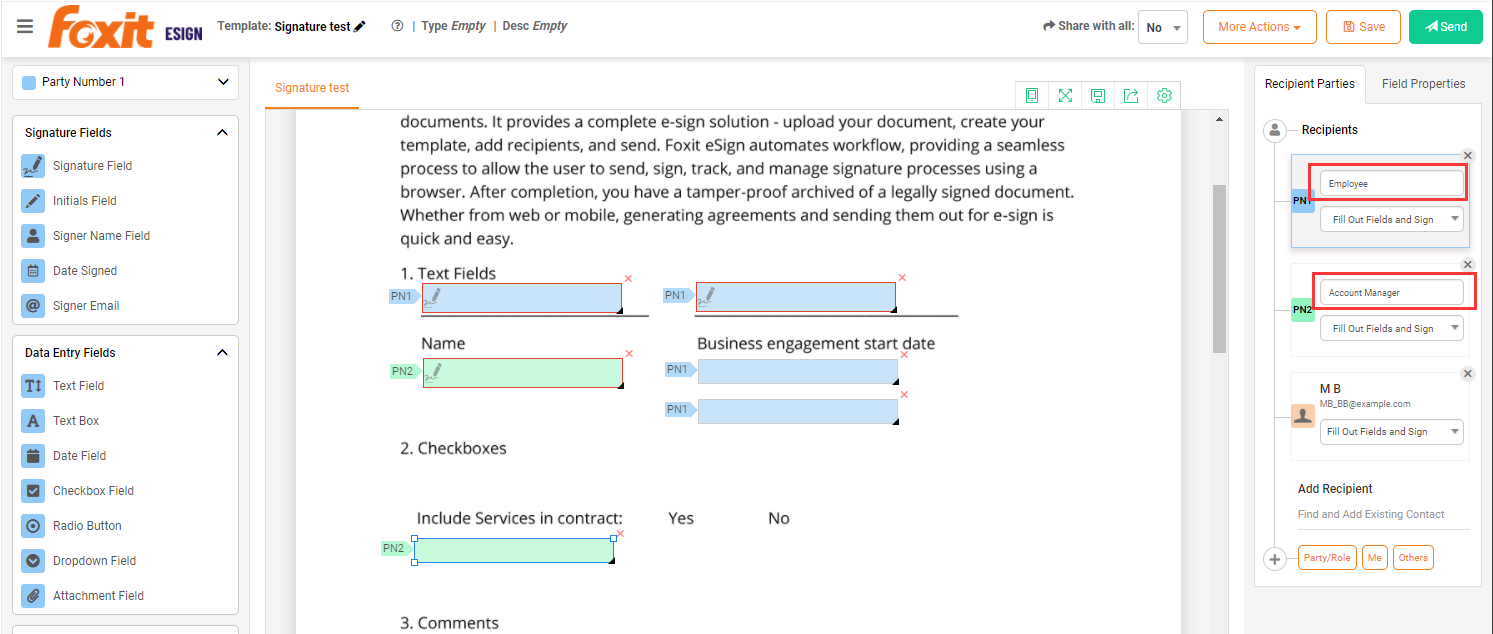
- Navigate to “Recipient Parties” to add the total number of parties or recipients that will be involved in reviewing, filling out field values and eSigning. You will assign the name to each party later when sending the document for eSignature.
- It is important to note that when you drag and drop, the fields will be automatically assigned to the Party Highlighted in Gray on the right in the Recipient Parties section.
- Click on the field to assign properties.
- Create name, format, mandatory or not, and the responsible party based on the sequence of routing the document for eSignature.
- Similarly drag and drop eSignature and other fields to be filled out and assign properties and you can adjust the length and height of the field by dragging the tip on the bottom right corner of the field tag.
- You can select multiple fields using the CTRL key + Clicking on multiple fields.
- Multiple selected fields can be assigned to one party.
- You can edit the template name by clicking on the template on the top left corner.
- Save your template by clicking on ‘Save’ or ‘Save and Close’.
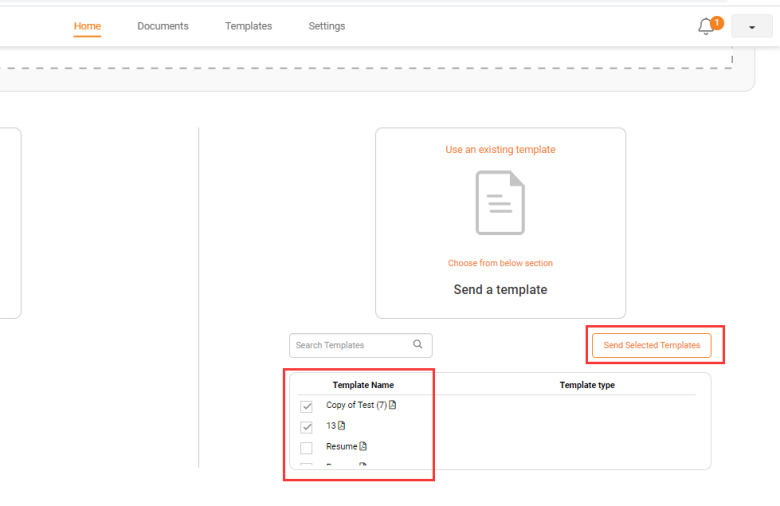
- One or more saved templates can be sent for eSignature by simply selecting and clicking on the send button from the ‘Template’ or ‘Home’ tab.
How To Send a PDF Template for eSignature
All the steps below assume you are logged in with an active account on foxitsign.foxit.com.
- Select one or more templates from the home page or from your templates page and click on the ‘Send Selected Templates’ button.

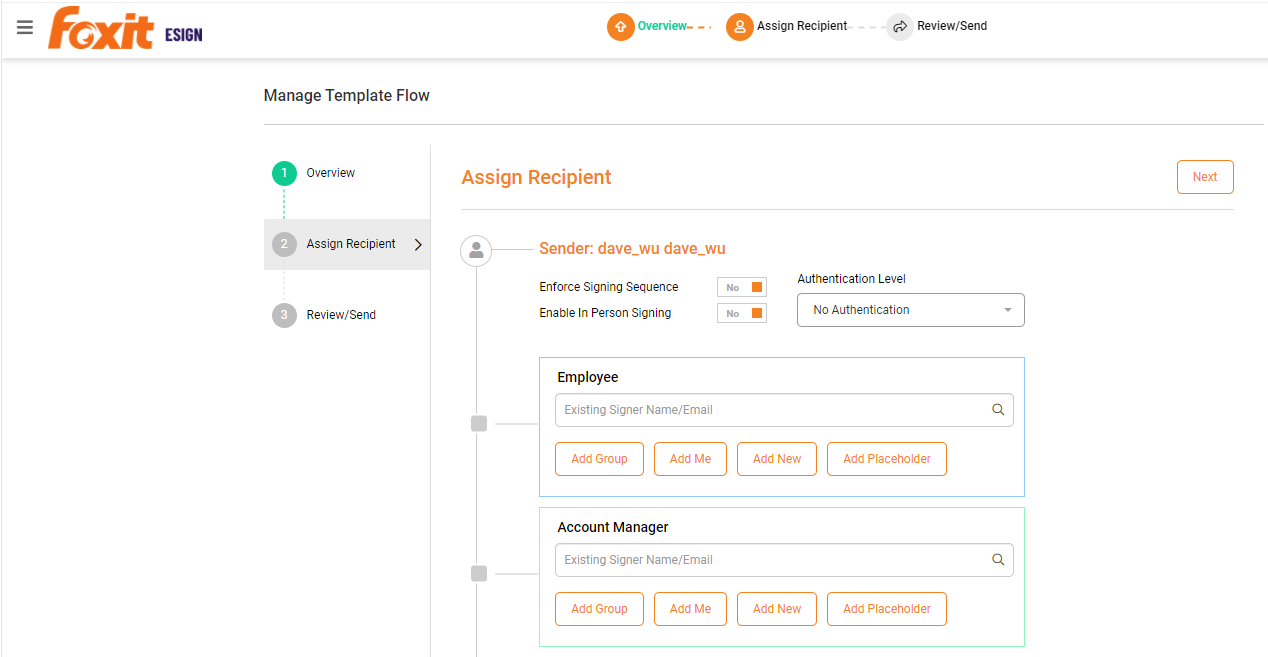
- Select ‘Enforce Signing Sequence’ if needed and add the recipient parties. If you have the party in your address book, you can simply select when you put your cursor on the email entry field. Alternately you can select ‘Add Me’ or ‘Add New’ button. For bulk eSignatures, please select an email list.
- When you enable sequence-based workflow, you will be able to set the workflow path in series combined with parallel by numbering each signer sequence accordingly. If the serial number against the recipient names are the same, they will get notified at the same time and can sign the documents in parallel. See the highlighted parallel and sequential workflow together during a sequence-based workflow.
- Also, select the action required by each party.
- Your default email template will appear. You can select alternate email template from the dropdown or change the language of the template before sending.
- You can send the document to the parties immediately by pressing the ‘Send Now’ button. If you press continue, then you can review the document in the draft status before sending and you may review and prefill some of the values.
- Enter the values of the fields that you can populate before sending the template. The fields can be edited by double clicking them Sender/Author is allowed to prefill value of the fields on behalf of other parties. However, if the fields are assigned to be filled by the other party, he or she will be able to edit pre-filled information as required.
- Click on ‘Send’ button when ready.
- Sender will be directly taken to review page, where he can press ‘Review Documents’ and get back to sign the document immediately. Other parties will receive notification email with link to the document to sign.
How To Assign Specific Roles And Person On Reusable Templates
Now, Foxit eSign allows you to assign roles and persons instead of generic parties identified by party numbers.
- Now user can assign roles like Manager, Supervisor, Accountant, Partner, etc. Now the fields assigned to each role remain separated, and it is easier to identify the signer name for each role while sending. Some users accidentally doing mistakes at the time of assigning parties on templates due to generic parties identification.

- You will be able to select Party or Role (You can add a role to the party), Me, and Other (specific signer)
- If you don’t assign the role to party, they will be identified as Party Number (PN1, PN2, etc.).
- Template sending Screen
