How to Create an Envelope
All the steps below assume you are logged in with an active account on foxitsign.foxit.com.
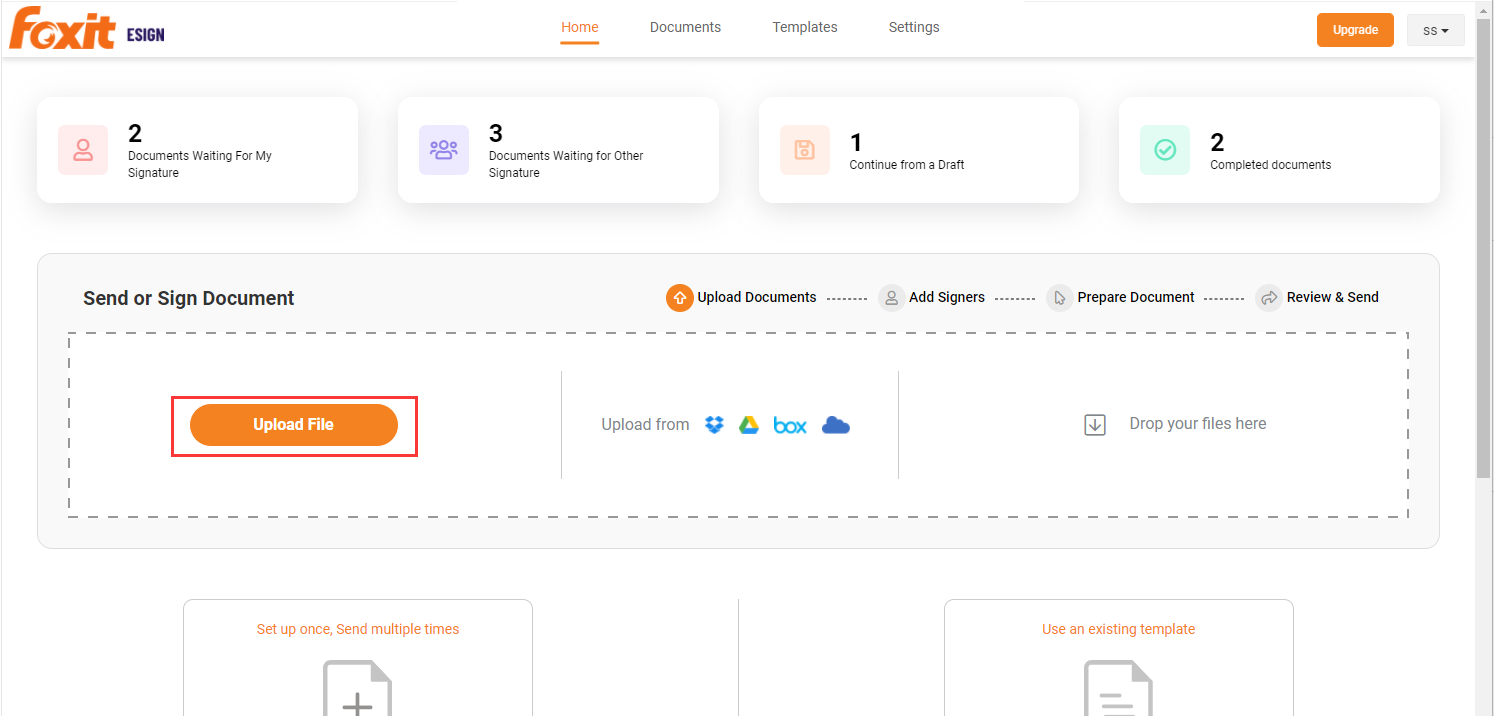
- After logging into the application, upload the file from your computer when you click on ‘Upload File’ under the ‘Send or Sign Document’ section and select the PDF file.

- Once the PDF loads, select the tags from the left side toolbar and drag and drop at the places where you want the sender or recipient to fill out the information. Please note that you can add more PDF documents to this folder using the Add button above the document area.
- Click on the field to select and enter its properties.
- In the field properties, enter the name and optional description, select format as required and assign to the recipient. You can add the recipient before starting the drag and drop operation or during it.
- Since there are no recipient parties created so far, we need to add the parties that will be signing this document in the next few steps and even you can add yourself as a party by clicking ‘Add Me’.
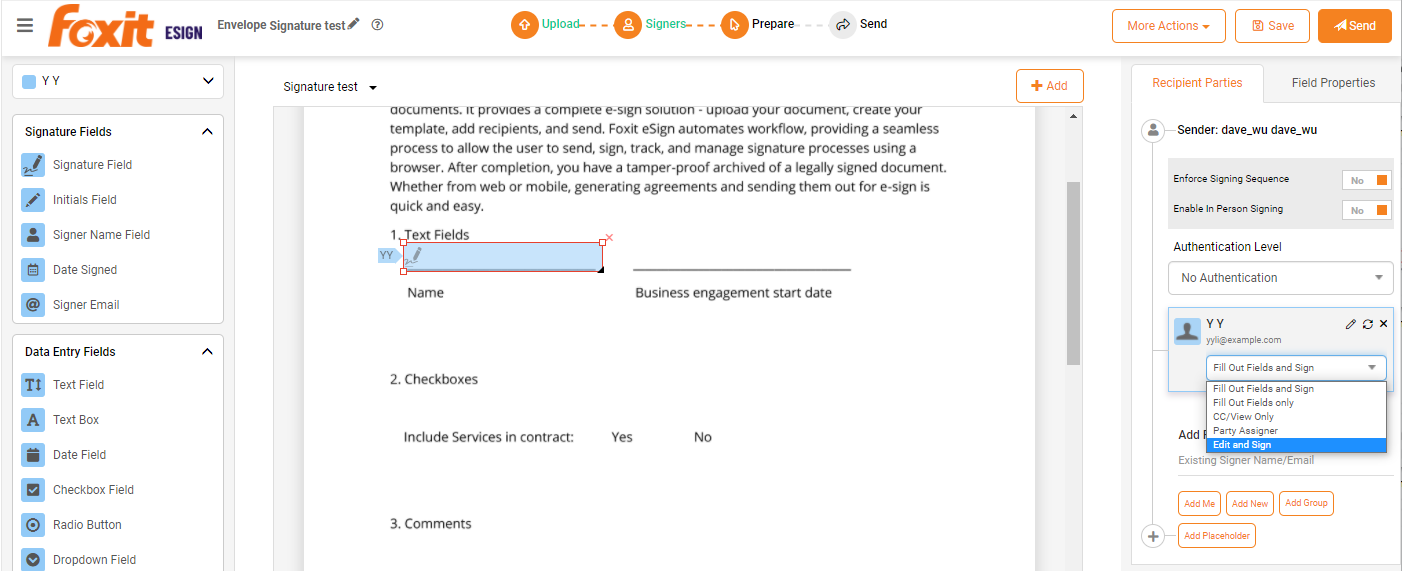
- You can assign each party access to view only, fill fields only, or fill fields and sign document.
- Click on ‘Add New’ to add a new party. If you have sent the document to any party previously, the name will appear in the recipient parties dropdown as you start typing.
- Select ‘Enforce Signing Sequence’ if needed. When you enable sequence based workflow, you will be able to set the workflow path in series combined with parallel by numbering each signer sequence accordingly. If the serial number against the recipient names are the same, they will get notified at the same time and can sign the documents in parallel. See the highlighted parallel and sequential workflow together during a sequence based workflow.
- You can also arrange the signer sequence by dragging and dropping the recipient names in the correct place and the sequence number will change automatically.
- Select the fillable field and select the party responsible for providing the value in the field properties section on the right.
- Drag and drop the additional fields and signature box to be filled out during the sending and eSignature process.
- You can adjust the length and height of any field by dragging the tip on the bottom right corner of the field tag.
- Drag and drop other fields similarly and assign them properties.
- You can select multiple fields holding down the Control key while clicking on multiple fields.
- Multiple selected fields can be assigned to one party. Similarly add additional fields and assign the party responsible for filling those fields.
- You can save each document as a template by selecting a file name under the ‘Save as Template Copy’ option from ‘More Actions’ dropdown. Alternately, you can send the document for eSignatures.
- You can send using the default email template, choose a different email template or simply edit the language while sending. You can create as many notification templates as required in the ‘Notification Template’ section and assign one as default.
Delegate Signing Authority During eSignature Flow
This feature allows the original signer to assign the document signing authority to an alternate person. This functionality is especially useful when the signer is not fixed and signing responsibility can be transferred to the appropriate party.
Steps to Enable Delegating Signer Responsibility:
Delegation functionality can be set up at the account level as well as the document level. Account level setting ‘Allow recipient to delegate signer’ is defaulted to all documents; however, specific document delegation behavior can be altered from ‘Advance Sending Options’ under ‘More Actions’ menu for individual document or set of documents in a folder.
Account users need to follow the below steps to activate delegate signing from the account settings page.
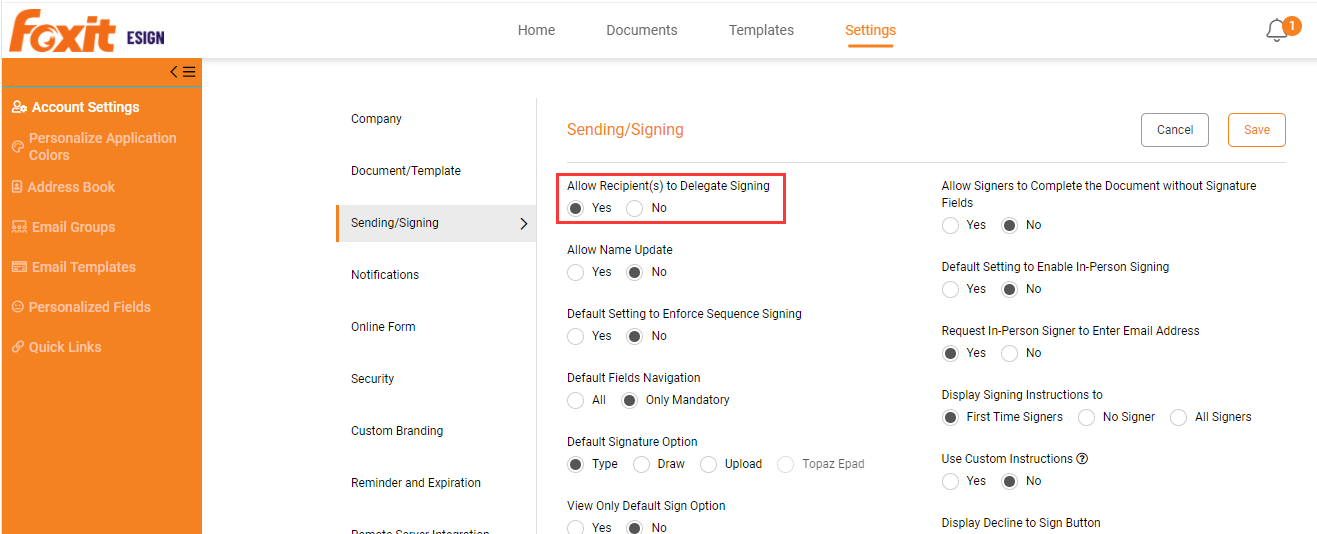
- Navigate to Settings > Account Settings.
- Set ‘Allow recipient(s) to delegate signing’ as yes and it will allow the recipient/signer to authorize its delegate for signing the document.

In order to activate the delegate feature for a particular document, users need to follow the below steps:- Go to the Advanced Sending Options.
- Click on Yes, to override the account default settings and assign the delegate option in the document.
Steps to delegate signer:
- To delegate the signer, the recipient can select ‘Delegate Signer’ from the “More Actions” dropdown menu.
- Once the signer clicks on “Delegate Signer”, he/she must provide the full name and email of the new signer and comments with the acceptance email.
- Once the document is assigned to the other party, a notification email will be sent to the Author/Sender and Delegated Signer. The original signer privilege will change from ‘Fill fields and Sign Document’ to ‘CC/View Only’.
- New signer can click on the link to sign the document. To see how to sign the document, please review document signing steps eSignature by Recipient.
How Recipients Sign a Document
In this section, you will learn how recipients will electronically sign documents. Foxit eSign does not require recipients to have an account or login, but if needed, it can be required. Your signers can simply click the link in the e-mail they receive to access their electronic document for signing. Once completed, they will also receive a copy of the document in their e-mail inbox.
eSignature Steps for the Recipient
- Each recipient receives the email and link to the document.
- Clicking on the ‘View Documents’ link takes the recipient directly into the document. If you are signing the document for the first time, you will get a popup with instructions to sign the document. Review the instructions carefully and accept them.
- Each recipient will fill out the highlighted field values in the document.
- The text box which is highlighted in “Red” is the mandatory field to be filled by the recipient.
- The same name fields take same value across all documents. For example, if the textbox has the value “Name 1” if the recipient fills the name it get auto-filled in the document wherever it finds the same value of the field.
- The user can type text content, draw a signature, or import an image file to create a signature.
- If the recipients want to change the signature they can click on the “Change Sign” option at the upper-right corner of the page.
- Confirm that the user understands that eSigned documents are legally binding.
- In the comments section, you can post your comments for the other recipients. Comments are delivered via email and also remain on the document.
- You can view the document history anytime or resend the document to other parties if they have not reviewed it yet.
- All parties can download the signature certificate or email themselves a PDF copy of the signed document.
- All parties receive email with the link to the document upon eSignature completion/execution. Documents can be accessed by all parties anytime later unless the document(s) have been deleted by the owner. We recommend signers to download a copy for their own records.
Edit privileges in document
All the steps below assume you are logged in with an active account on foxitsign.foxit.com.
- Upload the PDF document and Add all the required fields. Set the permission as “Edit and Sign” for the party and send the document.

- After Sending the document, the Other party can fill the assigned field on the document. User (with edit and sign permission) can click on “Edit Document” from the ‘More Actions’ dropdown.
- An Edit Document pop-up will come and click on the Edit Fields button.
- A new version of the document is created and User (with Edit and Sign permission) can update the field values.
- Once editing happens, then all the previous signers get the email again to sign.