Create and Manage RMS Templates and Security Watermarks
Template Creation and Editing
To create a custom template, please see the following steps:
1. Choose Protect > Settings > Custom Templates.
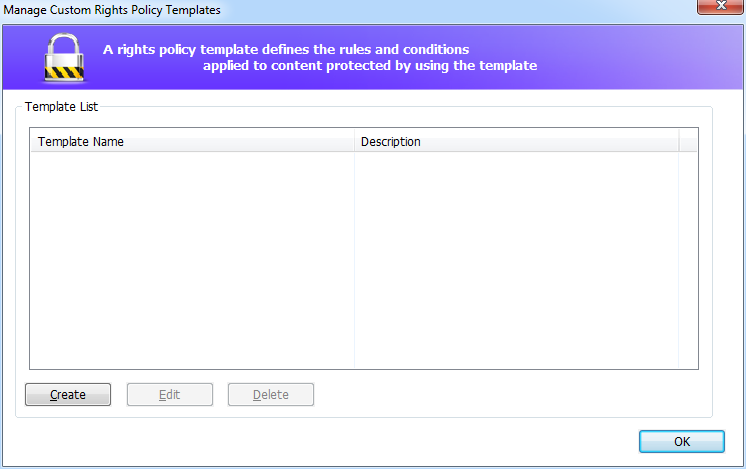
2. Click Create to open the Create Custom Rights Policy Template dialog box.
3. (Optional) If you want to edit the existed template, please click Edit.
4. Click Add to choose the language and edit template name and description. Click OK. The template name and description will be shown in the Template Identification list.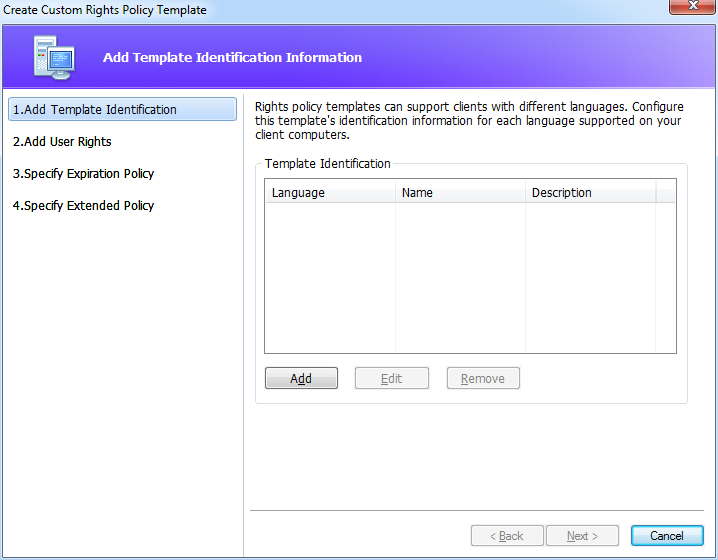
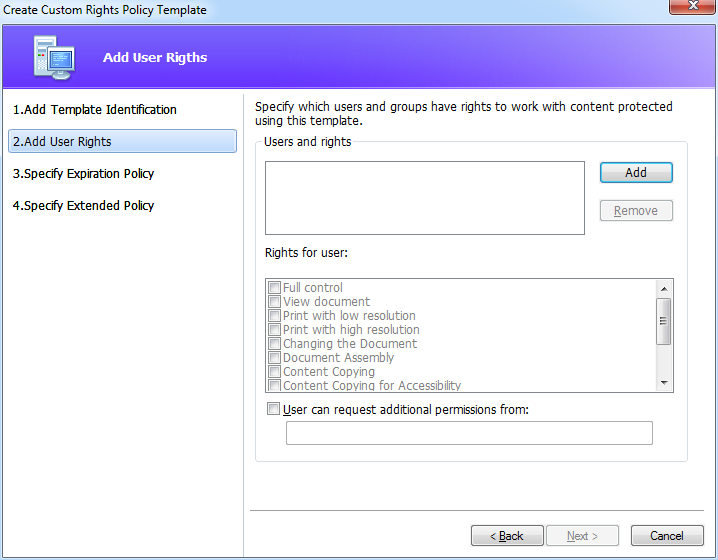
5. Click Next to add user rights. Click Add in Add Users and Rights.
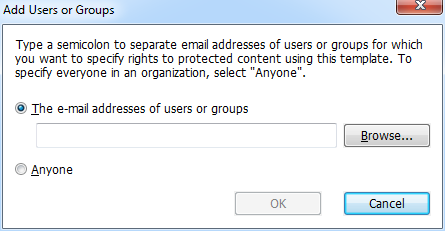
6. In the pop-up Add User or Group dialog box, choose The e-mail addresses of users or groups, click Browse to simply add a user who you would like to assign rights to. Selecting Anyone allows every user to work with the encrypted PDF files. You can type multiple e-mail addresses as well.
7. Check PDF permissions for the specified users. You can set the permissions for all of the users or set different permissions for specific users.
8. User can request additional permissions from: if users want to apply for any permissions, the application will launch the email client and list the email addresses you typed into the text in the Recipient's Address automatically. You can type a URL as well.
9. Click Next to specify the expiration policy.
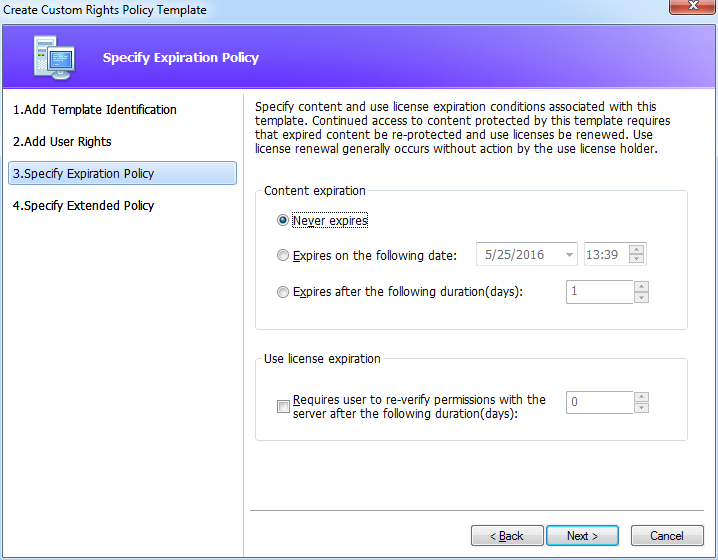
Content expiration
Never expires: the PDF content can be viewed indefinitely.
Expires on the following date: the PDF content will expire on a given date.
Expires after the following duration (days): the PDF content will expire after the desired days selected.
Use license expiration
Requires user to re-verify permissions with the server after the following duration (days): users need to apply for a new license to open the encrypted PDFs the specified number of days (the number you type into) later.
10. Click Next to set security watermarks and extended policies. Please refer to Security Watermark and Extended Policy.
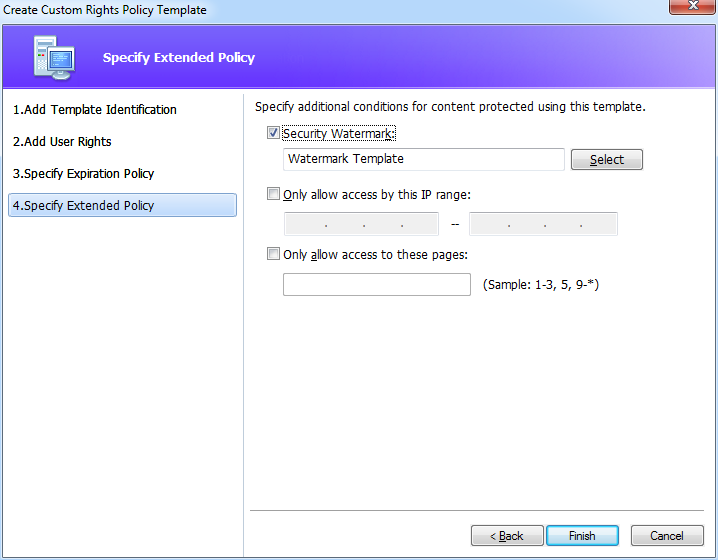
11. Click Finish to complete creating the template. The template will be added to the template list under Protect > Restricted Access.
Security Watermark Management
1. Create Profile
Before adding a watermark, you should create a profile first. The application will apply all of the watermarks in the profile to the PDF.
Note: you can only choose a profile but not a certain watermark to use. Please create the watermarks you want to add to a PDF in the same profile.
Choose Protect > Settings > Security Watermark to open Manage Security Watermark dialog box.
Click New Profile to create a profile and name it.
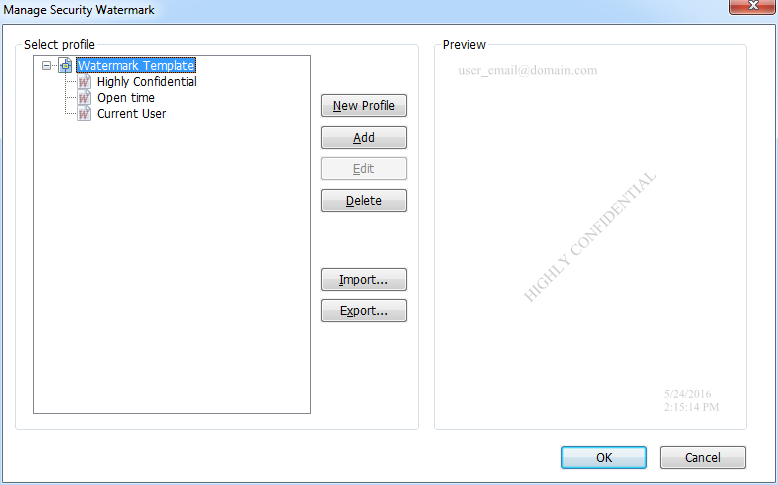
2. Add Watermark
To add a new watermark, please do the followings:
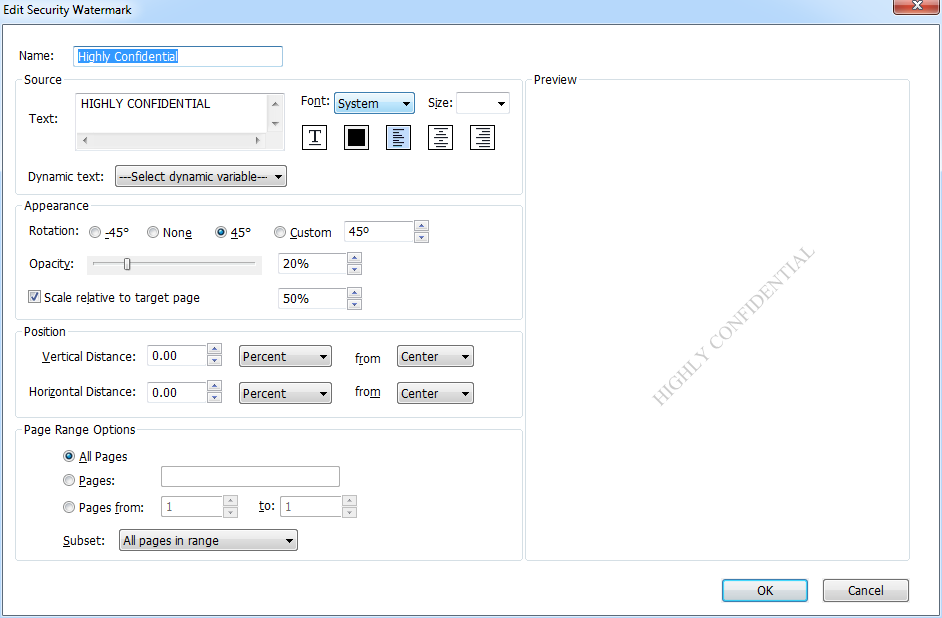
Open the Manage Security Watermark dialog box and select a profile you created and click Add to add watermarks in the profile.
Type the watermark’s name.
Fill in the watermark’s content in the text box and edit the settings for font, size, color, underline, and alignment.
Note: you can only set text as a watermark.
Choose the Dynamic text. When any PDF reader opens the file, the watermark will show the current document information dynamically and will use multiple texts at the same time.
Content ID: shows the content ID of the current document.
Document Title: show the current document title.
Author: show the author of the current document.
Current User: show the current user who is reading the document.
Date: show the current system date when opening the document.
Day: show the current system day when opening the document.
Month: show the current system month when opening the document.
Year: show the current system year when opening the document.
Time: show the current system time when opening the document.
Hour: show the current system hours when opening the document.
Minute: show the current system minutes when opening the document.
Second: show the current system seconds when opening the document.
Set the appearance by choosing the rotation degree and the opacity. You also have the option to make the scale relative to the target page.
Set the vertical and horizontal distance between the target page and the watermark.
Choose the page range to display the watermark. You can select the different page range options by selecting from the subset list.
Preview the watermark in the right pane.
Click OK to finish it.
3. Edit or Delete Watermark
Edit a Watermark
Open the Manage Security Watermark dialog box and select a watermark you want to edit.
Click Edit to open the Edit Security Watermark dialog box.
To edit the watermark, please refer to “Add Watermark”.
Click OK to finish the operation.
Delete a Watermark
Open the Manage Security Watermark dialog box and select a watermark you want to delete.
Click Delete to remove the selected watermark.
4. Import or Export Watermark
Import a Watermark
Open the Manage Security Watermark dialog box and click Import.
Choose a watermark with .xml format.
Click Open.
Export a Watermark
Open the Manage Security Watermark dialog box and select a watermark you want to export.
Click Export and choose a file type and location to save.
The watermark will be exported as an .xml file or an encoded file according to your choice. It can be integrated with the AD RMS policy template and applied to the PDF files by Foxit Reader (MSI).
Note:
1. If you want to integrate the watermark to a common policy template, please export it as an .xml file and add it to the template with Foxit Reader (MSI) directly.
2. If you want to integrate the watermark to an official policy template, please export it as an encoded file (.txt format) and integrate it into the template with AD RMS Scripting API Architecture. Then you can import the template and apply it to PDFs using Foxit Reader (MSI). (Please click here to see the example and use the value of “appData.Name” and “appData.Value” in the exported encoded file.)